

Buying a vinyl sticker takes a minute – but whether it ends up looking painted on or like a crooked plaster is decided in the ten minutes it takes to apply it. In this guide we’ve gathered everything we’ve learned in our workshop: which surfaces work, what tools you need, when the wet method makes sense, what to watch out for on cars and motorcycles, and how to remove a sticker cleanly later on.
This guide is long – use the table of contents to jump straight to your topic. If you’re just putting a small sticker on a light switch, the “Preparation” and “Step by step” sections are all you need. For cars and motorcycles, it’s worth reading the whole thing.
What kinds of stickers are there?
Not every sticker is applied the same way. Before you get started, take a quick look at what you’re holding:
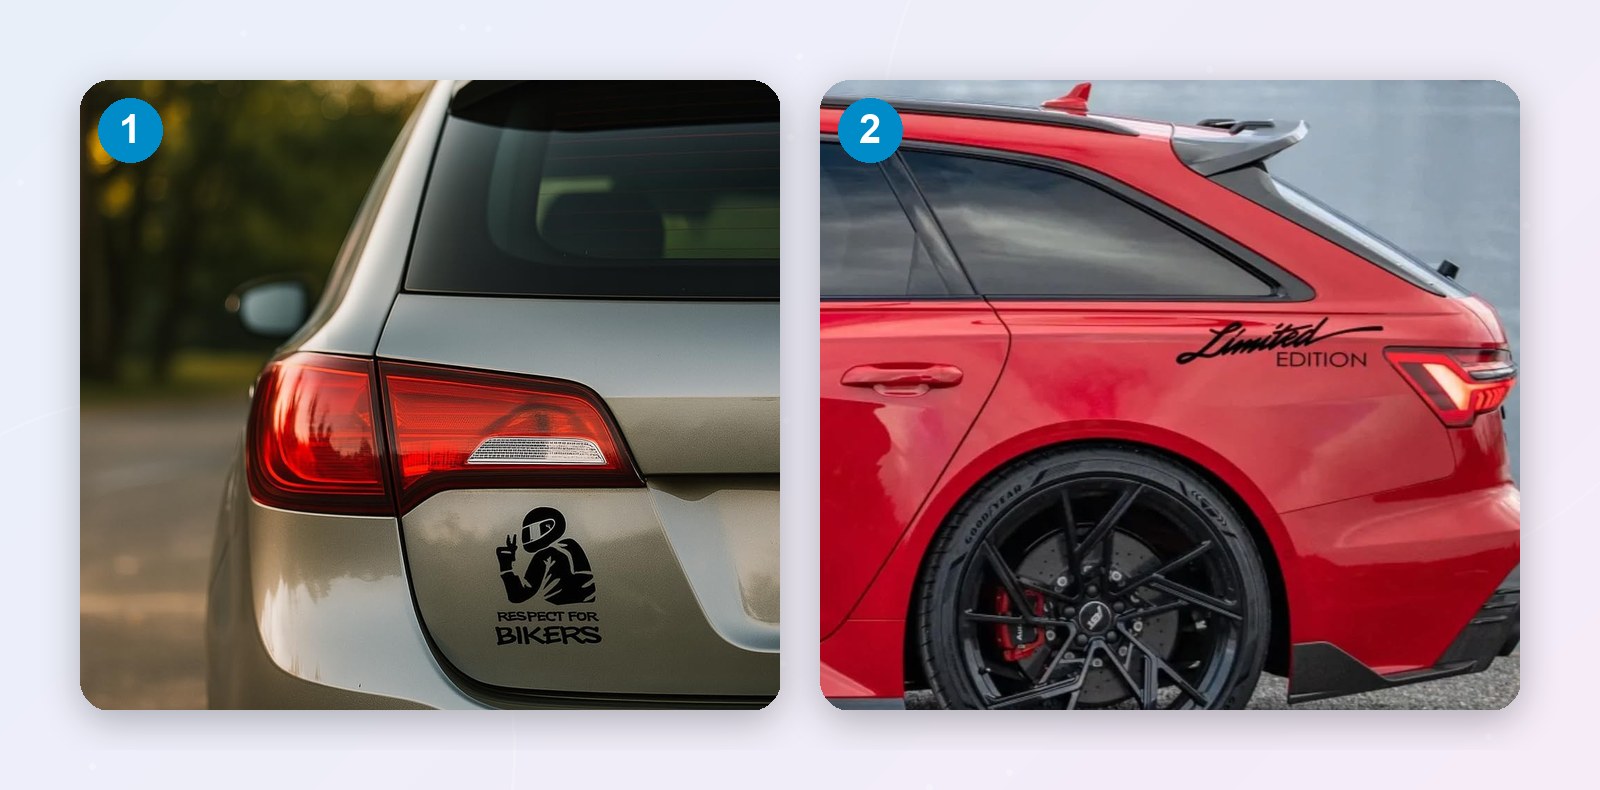
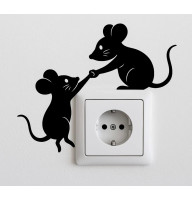
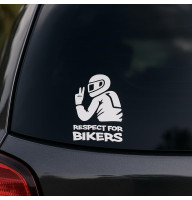
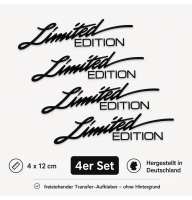
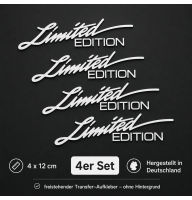
- Plotted stickers (contour-cut): Letters and designs are cut from single-colour film, with no background. They come in three layers: backing paper at the bottom, the vinyl in the middle and clear or semi-transparent transfer tape on top. Almost all of our wall and car stickers – such as Limited Edition, Respect for Bikers or the “Rescue Mouse” for your power socket – are made this way.
- Printed stickers: The design is printed on white or clear film and usually laminated as well. They only have backing paper, no transfer tape, and are applied like a big label.
- Calendered and cast film: Calendered film is tough and ideal for flat or gently curved surfaces. Cast film is thinner and more stretchy, which makes it better for strong curves like the ones you find on a motorcycle tank. For each of our stickers we state what it’s intended for – if in doubt, just ask us.
What you’ll need
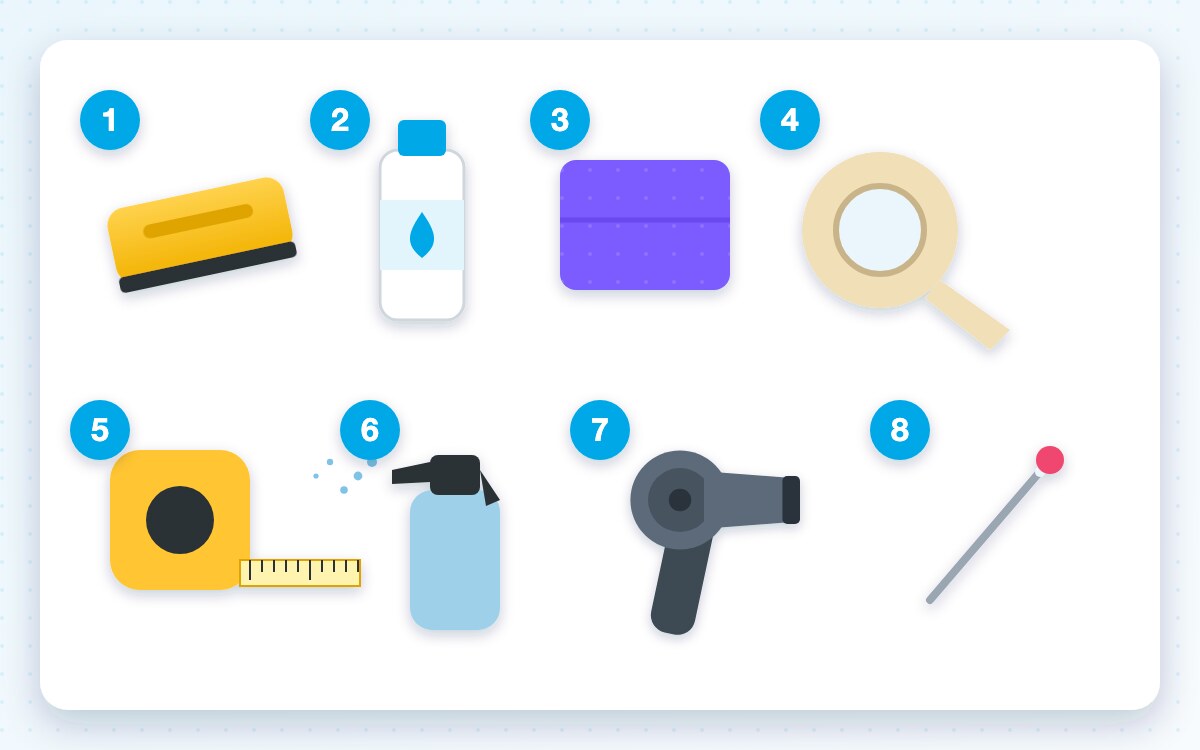
| Tool | What for | Emergency substitute |
|---|---|---|
| Squeegee, ideally with a felt edge | Pressing down without scratches | old plastic card wrapped in a cloth |
| Isopropyl alcohol (70–99 %) | Degreasing the surface | methylated spirits or silicone-free glass cleaner |
| Lint-free microfibre cloth | Cleaning and drying | plain paper towel |
| Masking tape | Holding the position (“hinge”) | any tape that comes off easily |
| Tape measure, spirit level or smartphone app | Aligning straight and centred | ruler |
| Spray bottle with water and 1 drop of washing-up liquid | Wet method for large stickers | – |
| Hair dryer (or heat gun on a low setting) | Curves, cold, removal | – |
| Fine needle | Removing air bubbles afterwards | tip of a craft knife |
The right conditions
The adhesive on vinyl film is pressure-sensitive and temperature-dependent. Most mistakes don’t happen during the actual application – they happen because it was too cold, too hot or too dusty.
- Temperature: 15–25 °C is ideal. Below 10 °C the adhesive grips much less well. What matters is the temperature of the surface, not the air – a car that spent the night outside is often much colder in the morning than the air around it.
- No blazing sun: On hot paint the film goes soft, stretches and sticks instantly – there’s hardly any chance to correct it.
- No wind, no dust: Every speck of dust under the film will later show up as a little bump. Outdoors, work somewhere sheltered from the wind, or better still in the garage.
- Dry surface: After washing, or if there’s dew, let everything dry for at least an hour – gaps and edges included.
- Let the sticker acclimatise: If the parcel arrives from the cold, leave the sticker at room temperature for one to two hours before applying it – lying flat, not rolled up.
Which surfaces are suitable?
Vinyl sticks best to smooth, non-porous surfaces. The rougher, more porous or “greasier” a surface is, the harder it gets.
| Surface | Suitability | Note |
|---|---|---|
| Glass, mirrors, tiles | very good | degrease thoroughly, avoid grout lines |
| Factory paint on cars or motorcycles | very good | remove wax and sealant first |
| Smooth painted furniture, fridges, doors | good | no oiled or waxed wood |
| Smooth wall with emulsion paint | good | let the paint dry for at least 2–3 weeks |
| Hard plastic (switch plates, laptop) | usually good | test on an inconspicuous spot first |
| Fresh paint (after a repair) | only later | wait 4–6 weeks until the paint has fully cured |
| Matte paint, vehicle wrap, ceramic coating | limited | may leave glossy edges or not stick well |
| Woodchip wallpaper, textured plaster, silicone paint | poor | the film only touches the high points |
| Soft plastic, rubber, textiles | unsuitable | plasticisers dissolve the adhesive |
Not sure? Stick a small leftover piece of transfer tape or a test letter on an inconspicuous spot and peel it off again after a day. If it held well and leaves no marks, the surface is fine.
Preparation: the most important step
Nine out of ten stickers that lift at the edges fail because of poor cleaning. Grease, wax, silicone from care products or even just fingerprints stop the adhesive from making contact with the surface.
- Wash the surface with water and a little washing-up liquid and let it dry completely.
- Wipe it down with isopropyl alcohol and a clean cloth – in one direction, not in circles, so you don’t just spread the dirt around.
- On cars and motorcycles: wax, polish, spray sealant and paint cleaner are off-limits. If the area was sealed, clean it several times with alcohol.
- Don’t touch it with your fingers any more. From now on, only gloves or a cloth.
Positioning and alignment
Hold the sticker, still with backing paper and transfer tape, in the spot you want and take two or three steps back. What looks straight up close often looks crooked from a distance – especially on a car, where the body lines guide the eye.
- Measure the distance to a reference edge (window frame, trim strip, edge of the table) at both ends of the design. If the values match, it’s parallel.
- On a wall, a spirit level or your smartphone’s level app will help.
- On a car, go by the body lines rather than a spirit level – cars rarely stand perfectly level.
- Mark the corners with small pieces of masking tape. That way you’ll find the position again if you need to take the sticker off once more.
Step by step: the dry method
The dry method is the standard for all small and medium-sized stickers up to about 50 cm wide – and the only right method for walls. We use what’s known as the hinge method.
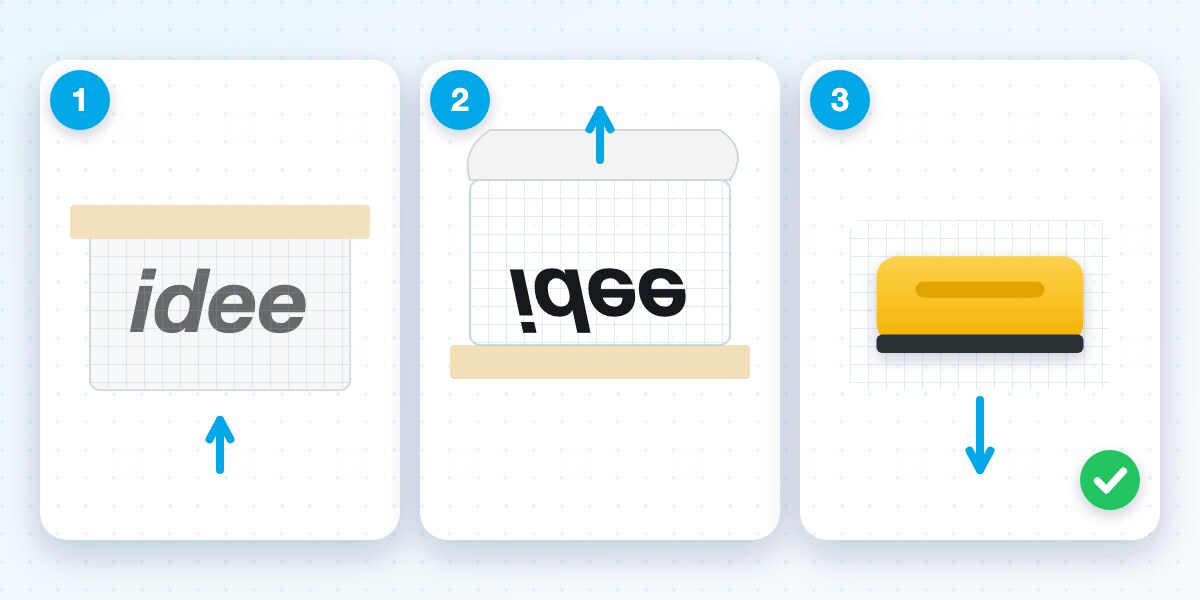
- Pre-press: Lay the sticker on a table with the transfer tape facing up and rub firmly over the whole surface with the squeegee. This makes sure the letters are firmly attached to the transfer tape.
- Set the hinge: Position the sticker and put a long strip of masking tape across the top edge – half on the sticker, half on the surface.
- Peel off the backing paper: Flip the sticker up on its hinge. Peel the backing paper off slowly and flat – don’t yank it upwards. If a letter stays stuck to the paper, put the paper back, press firmly with the squeegee again and pull once more.
- Fold it back: Keep the bottom end of the film slightly taut and away from the surface. The film should only touch the surface as the squeegee passes over it.
- Press down: Start right at the hinge and work your way down with the squeegee. Each stroke overlaps the previous one by half, and you always press from the centre outwards.
- Rub down again: Remove the masking tape and go over the whole surface once more – especially fine details and edges.
- Peel off the transfer tape: See the next section – this is where most mistakes happen.
For very wide stickers, put the hinge in the middle instead of at the top: first peel off one half of the backing paper, cut it off and press that half down, then remove the hinge and apply the second half the same way. That way nothing can warp.
Pressing down properly with the squeegee
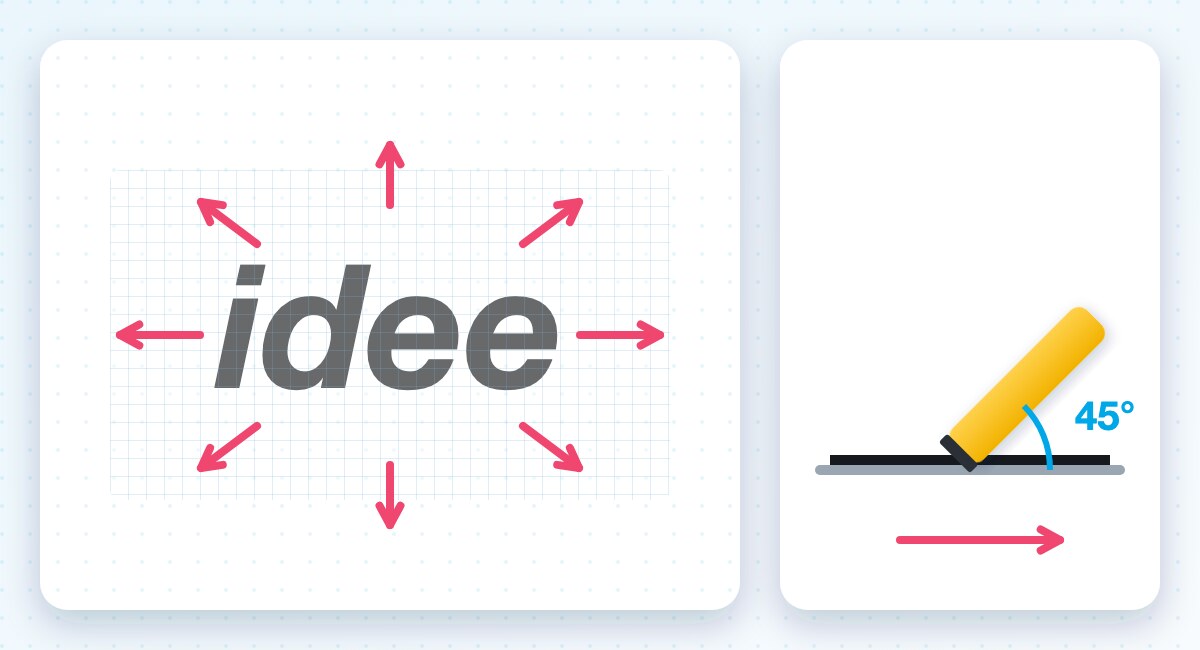
- Hold the squeegee at an angle of about 45° and press firmly. Too little pressure is the most common reason letters later stay stuck to the transfer tape.
- Always work from the centre towards the edges. That way the air gets pushed out instead of trapped.
- Use the felt side of the squeegee directly on the film. The hard edge can leave shiny scratches on the vinyl.
- Better several firm passes than one hasty one. With fine lettering, press down each line individually.
Peeling off the transfer tape without trouble
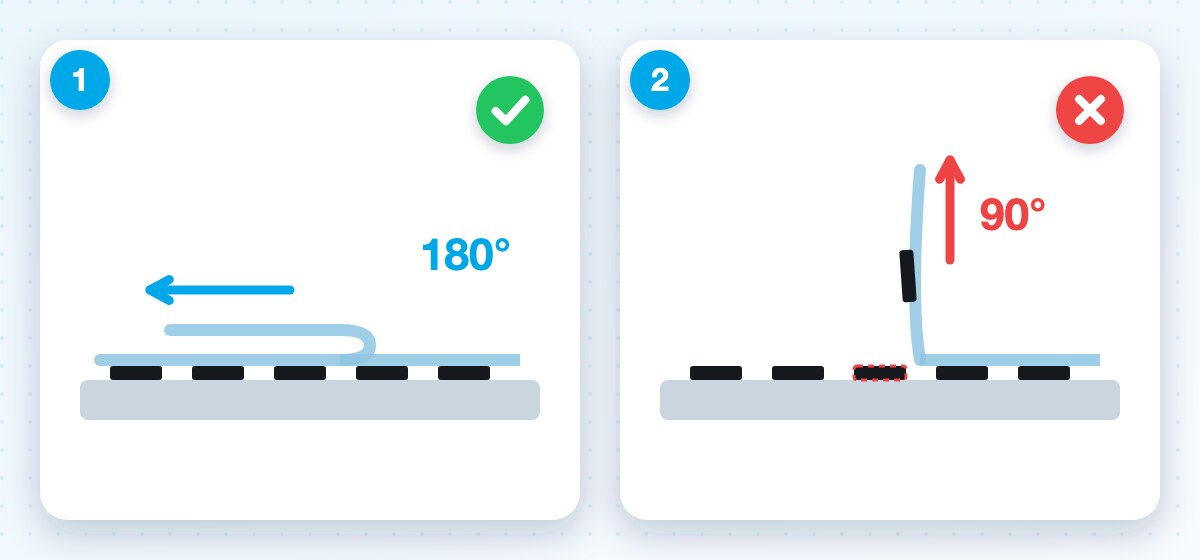
Starting at one corner, peel off the transfer tape flat and slowly – at almost a 180° angle, so the tape slides back close over itself. If you yank it steeply upwards, you’ll lift the freshly applied letters right off again.
- If part of the design lifts with it: stop immediately, lay the transfer tape back down, press firmly with the squeegee or your thumb, wait 1–2 minutes and try again.
- In the cold, a short, gentle blast from the hair dryer on the surface can help the adhesive grip better.
- Peel in the direction of the finest details, not against them – so pull long thin lines lengthwise, not across.
- After peeling, run your fingers or the felt side of the squeegee over all the edges once more.
The wet method for large stickers and glass
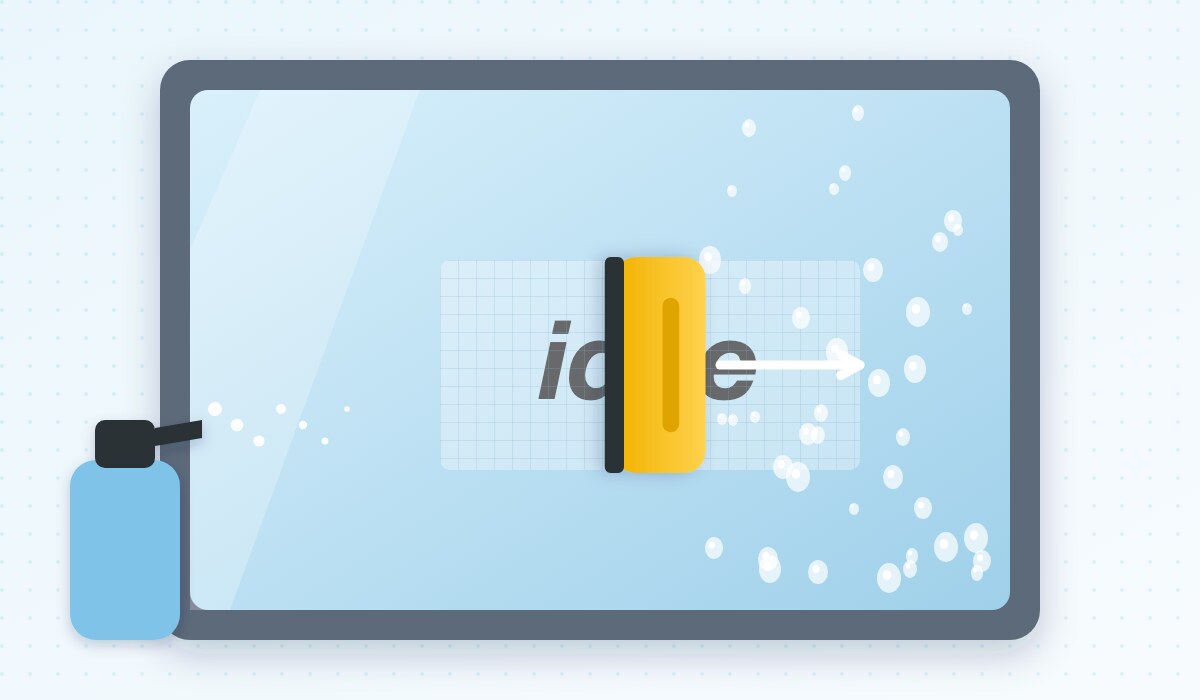
For large stickers on glass or smooth paint, the wet method helps: a thin film of water stops the adhesive from grabbing straight away. You can still slide the sticker around, and air bubbles are easy to push out.
- Fill the spray bottle with water and add a single drop of washing-up liquid. More is worse – then the sticker won’t stick for days.
- Clean the surface as described above, then spray it evenly.
- Peel off the backing paper completely and lightly spray the adhesive side of the sticker as well.
- Lay the sticker on, slide it into position and then push the water out from the centre outwards – with firm pressure and plenty of strokes.
- Now wait: only peel off the transfer tape after 30–60 minutes, longer in cool weather. Work especially flat and slowly.
- Any small water bubbles left over will evaporate through the film over the next few days.
At home: walls, tiles, furniture, switches
Walls
- Only apply to smooth, fully cured emulsion paint. Freshly painted walls need 2–3 weeks, otherwise the paint outgasses under the film and bubbles form.
- Woodchip wallpaper and coarse plaster are unsuitable: the film only rests on the high points and comes loose again.
- Don’t “scrub” walls with alcohol – a dry microfibre cloth to remove dust is enough, so the paint doesn’t start to dissolve.
- Always use the dry method.
- Removing it years later: warm it with the hair dryer and peel very flat, otherwise paint can come off with it.
Light switches and sockets
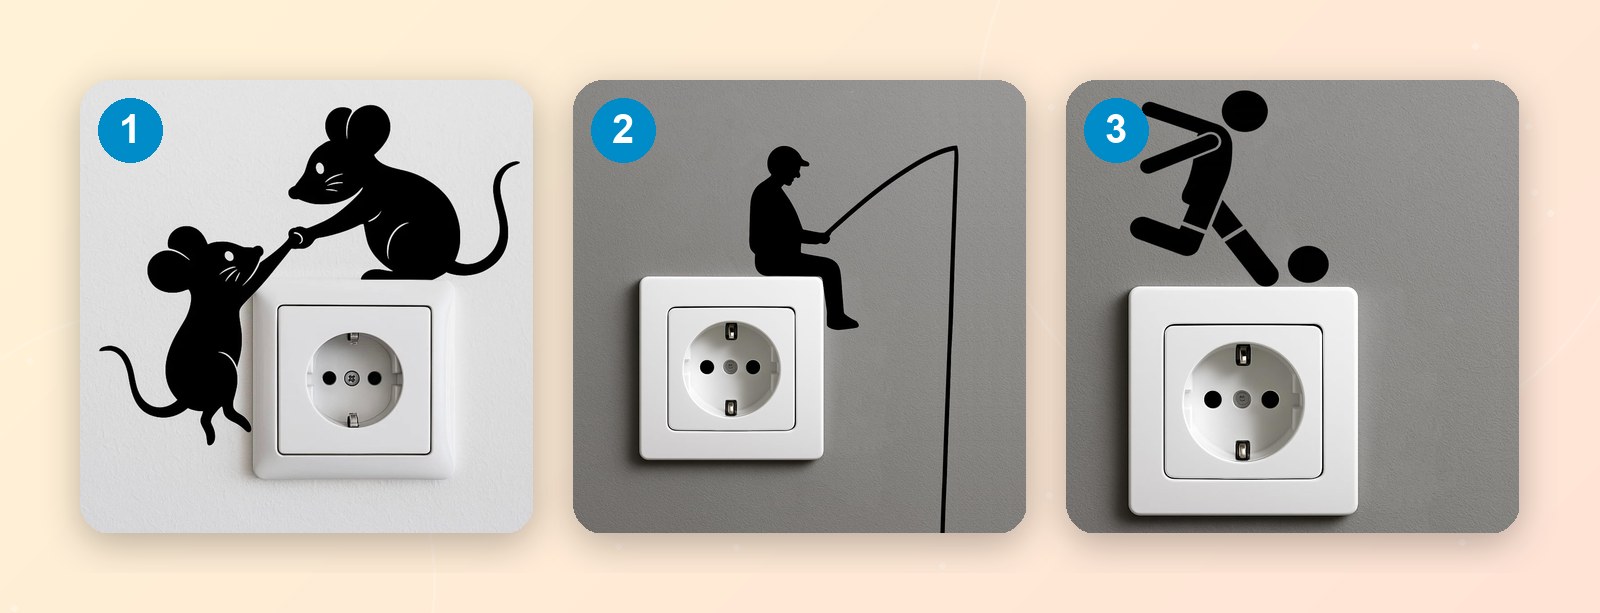
- Only stick them on the frame or the wall, never into openings, over contacts or over screw covers.
- Better to leave the switch rocker itself free – it’s touched all the time, and the edges lift there first.
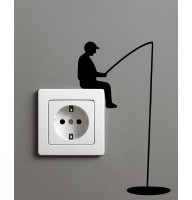
- Designs like our “Rescue Mouse” at the socket or the Angler at the light switch are made exactly for this: they “interact” with the switch without covering it.
- Clean plastic frames beforehand with a slightly damp cloth and let them dry; use isopropyl alcohol only sparingly.
Tiles, glass, furniture and mirrors
- On tiles, try to place the sticker so it doesn’t run across grout lines. If that can’t be avoided: press the film into the grout with your fingernail or the end of the squeegee and warm it slightly.
- In the bathroom and kitchen, don’t stick it right next to the hob or oven, or in the splash zone of the shower.
- Oiled or waxed wood is unsuitable. Smooth, painted furniture, on the other hand, is ideal.
- On glass and mirrors the wet method works too – only for delicate designs is dry the better choice.
On your car: rules, spots and special points
What’s allowed
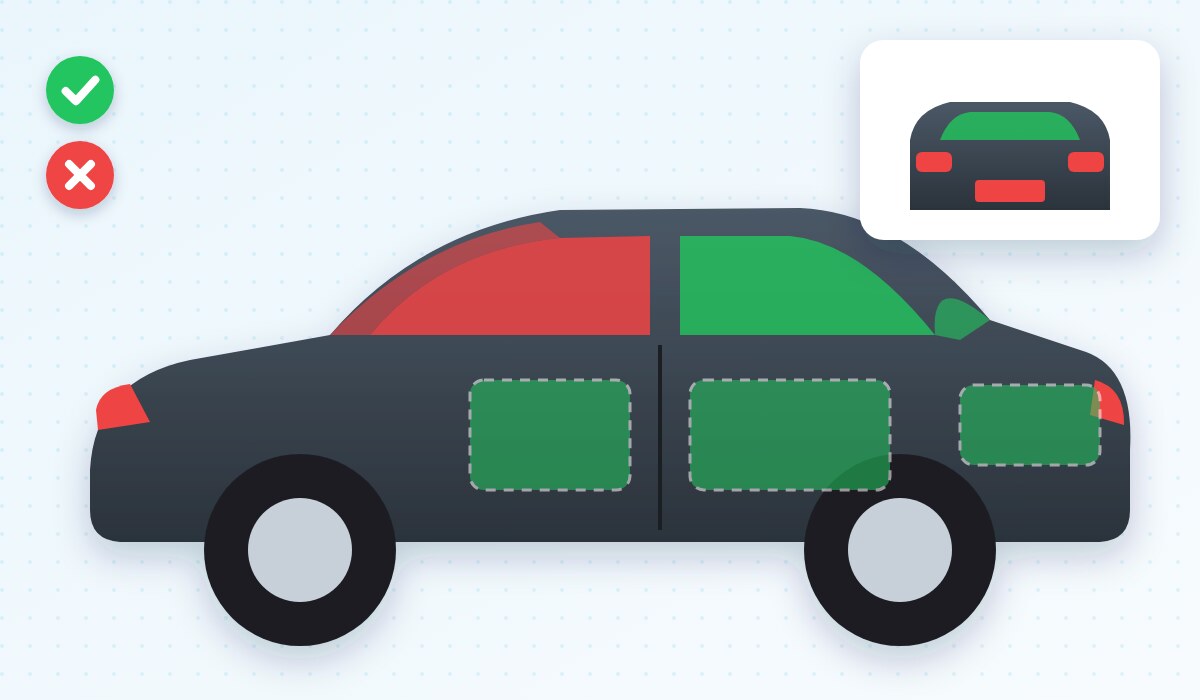
In Germany and most EU countries the rule is: stickers must not restrict the driver’s view or cover any safety-relevant parts. In practice that means:
- The windscreen and the front side windows stay clear (exception: mandatory badges and vignettes).
- You may put stickers on the rear window if the car has two exterior mirrors – but you still shouldn’t restrict your rear view unnecessarily.
- Headlights, tail lights, indicators, reflectors and number plates must not be covered or tinted.
- Offensive or anti-constitutional designs are prohibited – and advertising on private vehicles may have its own rules depending on the country.
The exact regulations vary from country to country. If in doubt, it’s worth a quick check with a vehicle inspection centre or an automobile club.
The right spot on your car
- Flat surfaces like the tailgate, wings or doors are ideal. Avoid pronounced creases and edges – the film is under tension there and lifts first.
- Door gaps: If a design runs across a door, first apply it in one piece, then cut it precisely in the gap with a sharp craft knife. Only cut the film, not into the paint! Then wrap the ends around the edge or trim them neatly.
- Rear window: Don’t stick anything in the sweep of the rear wiper – the wiper wears down the edges. The heating wires aren’t a problem, but never scrape over them with a blade when removing the sticker later.
- Fuel cap, mirrors, bumpers: Bumpers are often made of plastic containing plasticisers or have a slight texture. Test on an inconspicuous spot first.
After applying
- The adhesive only reaches full strength after 48–72 hours. During that time, don’t wash, don’t polish and don’t touch the edges.
- Wait at least a week before going through a car wash. With a pressure washer, always keep at least 30 cm away and never aim directly at the edges.
- No ice scraper over stickers on windows – in winter, use de-icer spray instead.
- Wax and polish can go over the film, but not with pressure along the edges. Avoid solvent-based bug removers.
- Leased or rental car? High-quality vinyl film can normally be removed from factory paint without leaving residue. After many years, though, the paint under the sticker may look a little fresher than the paint around it, because it hasn’t been faded by the sun.
On your motorcycle and helmet: curves, heat, petrol

There’s hardly a flat surface anywhere on a motorcycle. The tank, fairing and mudguards are strongly curved, and on top of that come vibrations, wind at high speed, heat from the engine and the occasional splash of petrol. With these tips your sticker will still hold:
- Choose the spot carefully: The flatter, the better. Small designs hold much better on curves than large ones. On strongly curved surfaces, thinner cast film helps.
- Use heat: Warm the film with the hair dryer until it feels warm to the touch (about 40–50 °C) – it gets softer and settles into the curve. Don’t overheat it: film that’s too hot distorts, and letters get narrower or tear.
- Lay it on, don’t pull: Film that’s stretched by force wants to return to its original shape and will lift at the edges after days or weeks.
- Relief cuts: For larger designs on a dome-shaped surface, small cuts between letters or in background areas can prevent creases.
- Degrease thoroughly: Chain spray, oil and care products are everywhere on a motorcycle. Better to clean twice with isopropyl alcohol.
- Seal the edges: After applying, press the edges down firmly once more with the pad of your thumb and a little heat. Round corners are better than pointed ones.
- Wipe off petrol immediately: Fuel attacks the adhesive at the edges. On the tank, don’t place stickers right next to the filler cap.
- Keep away from heat: Don’t stick anything on the exhaust, header guards, engine covers or other parts that get hot while riding.
Stickers on your helmet
- Only apply stickers to the outside of the painted shell, never on the visor, vents or padding.
- Don’t use solvents, thinners or harsh cleaners – some helmet shells are sensitive. Water, mild washing-up liquid and a soft cloth are all you need for cleaning.
- Follow the helmet manufacturer’s guidance: some manufacturers advise against stickers or specify areas that must stay clear.
- Reflective stickers on helmets are even mandatory in some countries – our designs don’t replace them.
Troubleshooting: bubbles, creases, lifting edges
| Problem | Cause | Solution |
|---|---|---|
| Letters stay on the backing paper | Not enough pre-pressing, cold | Put it back, press firmly; peel the backing paper off the transfer tape instead (turn the sticker over) |
| Letters stay on the transfer tape | Not enough pressure, angle too steep, cold surface | Put it back, press down, warm briefly, peel flatter and slower |
| Small air bubble | Air trapped while pressing down | Prick it at the edge with a fine needle and push the air out with your finger |
| Large bubble or crease | Film made contact too early | Carefully lift and press down again right after applying; after a few hours, only the needle helps |
| Edges lift after a few days | Grease, wax, stretched film, cold | Warm and press firmly; if that doesn’t help, clean the surface and apply a new one |
| Bubbles on the wall after a few days | Paint not yet fully cured | Vent with a needle; next time wait 2–3 weeks |
| Milky patches after the wet method | Residual water under the film | Wait – it usually disappears on its own after a few days |
Care and durability
- High-quality outdoor film lasts several years depending on the conditions. Horizontal surfaces like the bonnet or the tank take the most punishment, because sun and rain hit them directly.
- Wash with water, a mild cleaner and a soft sponge. No abrasive cleaners and no hard brushes.
- Indoors, wall decals and switch stickers last practically forever – as long as nobody rubs them with wet hands every day.
- Store unused stickers flat, cool and dry, and ideally apply them within a few months. If the film was stored rolled up, let it lie flat for a few hours before applying.
Removing a sticker
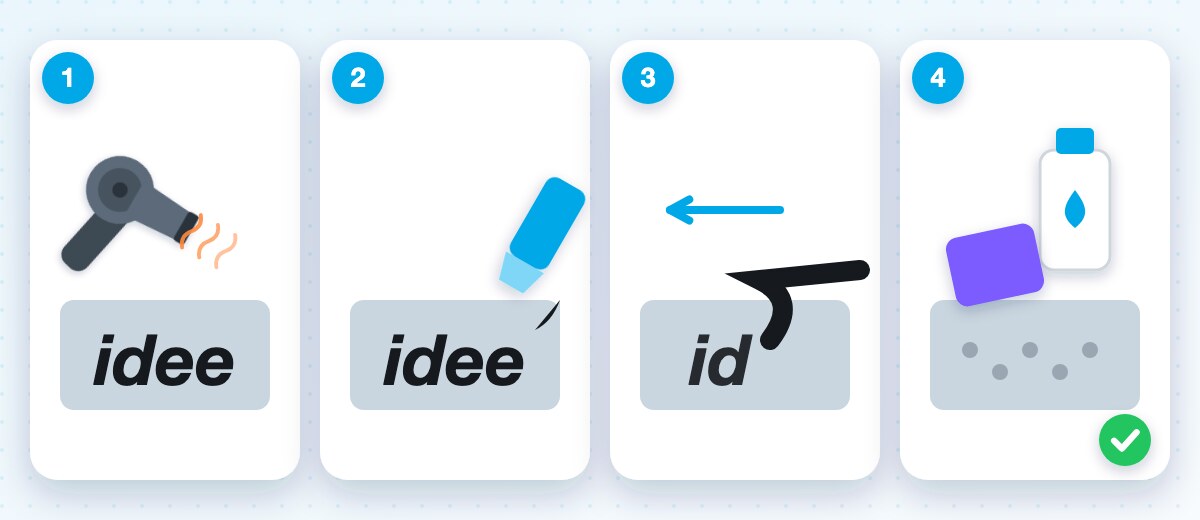
- Warm the sticker evenly with the hair dryer until it feels warm. Warm adhesive comes off much more easily and the film doesn’t tear.
- Lift a corner with your fingernail or a plastic scraper – never use metal on paint.
- Pull the film back flat and slowly, reheating it again and again as you go.
- Soften adhesive residue with isopropyl alcohol or a citrus-based adhesive remover and wipe it off with a cloth. On a car, wash the area afterwards and polish if needed.
- On glass you can use a ceramic hob scraper or a blade – but not over heating wires and not on tinted window film.
Checklist before you start
- ☐ Surface is suitable and at least 10 °C warm
- ☐ No direct sun, no wind, no dust
- ☐ Surface washed, dried and degreased with isopropyl alcohol
- ☐ Sticker pre-pressed with the squeegee
- ☐ Position measured and fixed with masking tape
- ☐ Backing paper peeled off flat, pressed from the centre outwards
- ☐ Transfer tape peeled off flat and slowly
- ☐ Edges rubbed down, no washing for 72 hours
Frequently asked questions
Can I still move a sticker after applying it?
With the dry method, only in the first few seconds and only carefully. With the wet method it stays movable for a few minutes.
Does a sticker damage car paint?
Not on intact factory paint. Resprayed areas that haven’t fully cured are a problem – paint can come off with the sticker when you remove it.
Can I drive off right after applying it?
Yes. High motorway speeds are no problem after a few hours; only the car wash and the pressure washer should wait.
What if I want the design bigger or in a different colour?
Many of our stickers come in several colours and sizes. For special requests – your own lettering, your own logo, mirror-reversed for the inside of a window – just get in touch.
Now you’re perfectly prepared. Pick a design from our shop – and if you take a photo of the result, we’d love to see it!
Write a comment